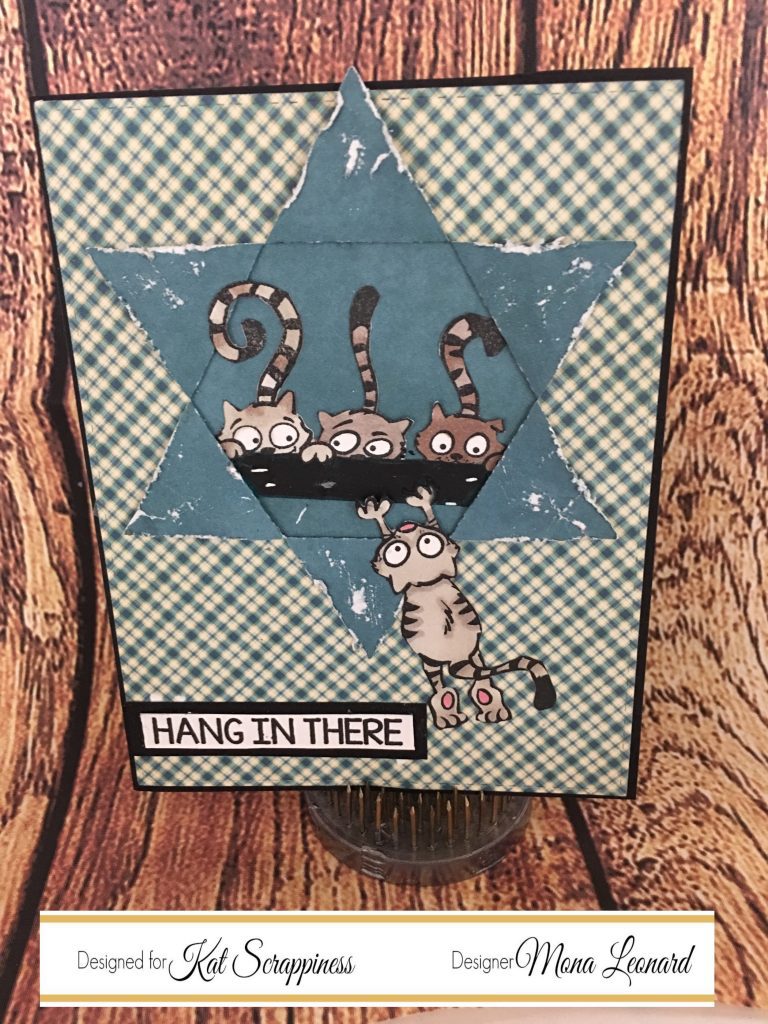
Hi everyone this is Mona back with a fun card featuring two ok Kat Scrappiness brand new Die and a stamp set from your next stamp.
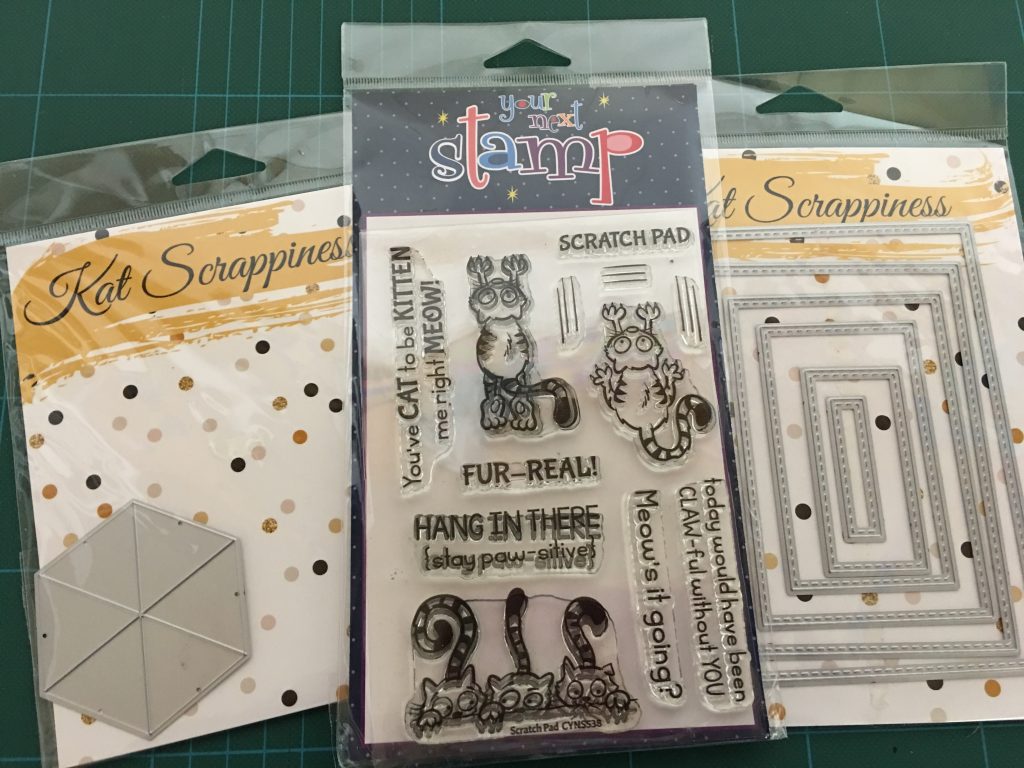
These is what I used, Kat Scrappiness Pop out Die , Kat Scrappiness Rectangle Stitched Dies ,Your Next Stamp Scratch Pad Stamp Set .
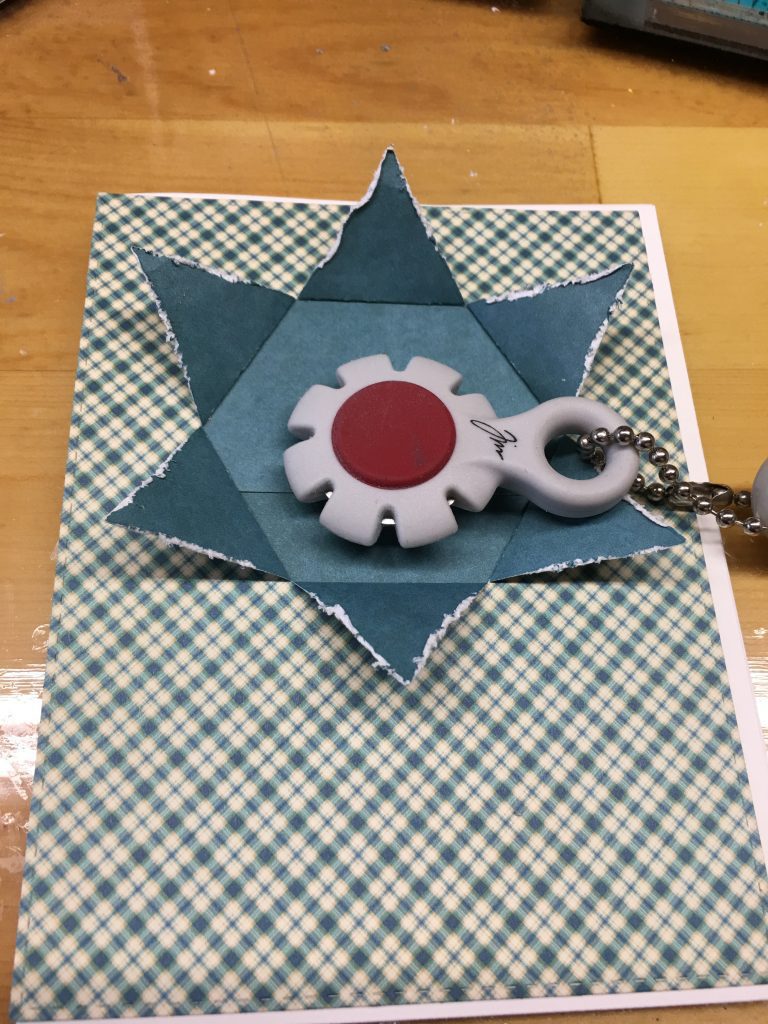
I started by cutting my card base in this picture you see it in white 41/4 x 51/2 , but I later change my mind and change it to black. I proceeded by cutting my front panel with dole sided pattern paper with the Kat Scrappiness Rectangle Stitched Die the largest of the set. I then placed my Pop out Die where I wanted the whole and die cut it and covered the back of the hole with the same cardstock. Now to give it the torn look I decided to use my Tim Holtz distressing tool around the picks of the hole.
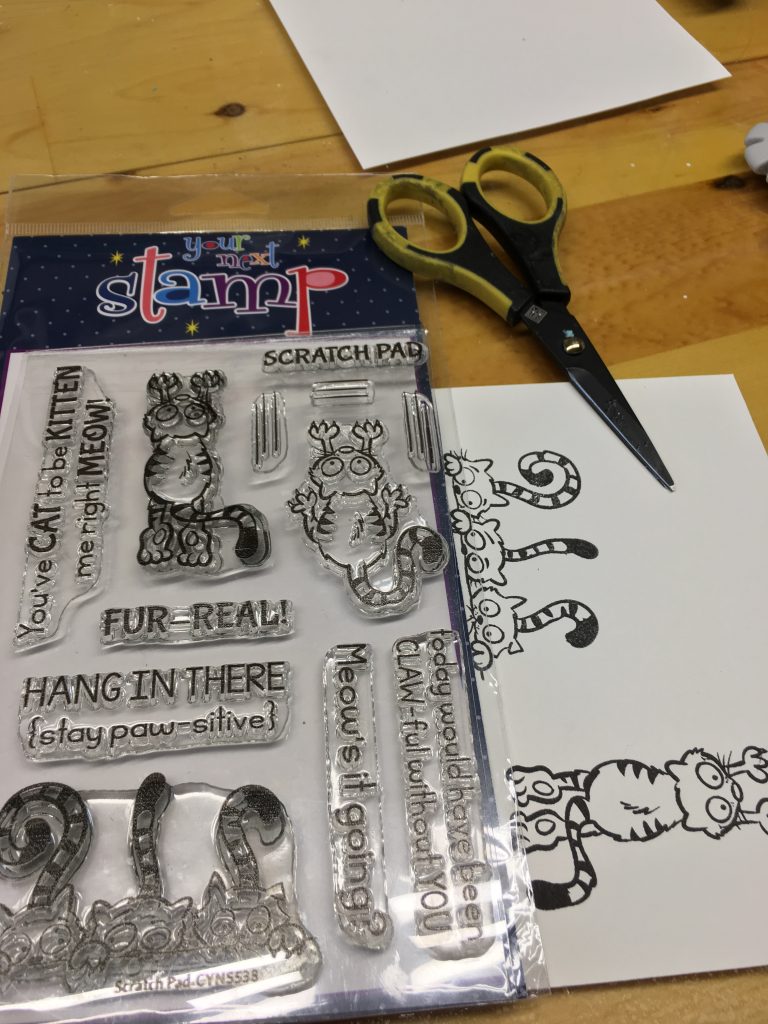
Now for the fun part stamping , colouring and fussy cutting all my cats and my sentiment.

Here I placed everything where I wanted it. But as you will see in my final picture I decided to cut sentiment in half,, leaving Hang in there on the front and stay pawsitive in the inside of the card. This completes my card for today.
Thanks for stopping by, hope to see you again soon. For your shopping convenience here is the link to Kat Scrappiness Store https://www.katscrappiness.com/
No comments:
Post a Comment