Pages

Thursday 25 January 2018

Hello Bee!

Good morning everyone this is Mona back with a bun card featuring Bee Girl from Prima.
I started by stamping the girl with my Lawn Fawn Black Jet ink, coloured her using my copics, then went ahead and fussy cut her. I also cut the pair of wings and added clear SN glitter.
For my card base I used a light blue and rage sentiments both come from the bee girl paper collection from Prima. I then adhered everything in place and that finishes up my card for today.
If you have any questions about products used don't hesitate to leave me a message.
Thanks for stopping by, hope to see you again soon here is the link to link to Kat Scrappiness for your browsing convenience.


Thursday 21 December 2017

Reindeer Christmas Tags

Hi everyone!  It’s Mona back with a few Christmas gift tags featuring Kat Scrappiness’ new Kat Scrappiness Woodland Reindeer Die.
I started by die cutting two tags using Tim Holtz tag Die and a few Distress Oxide Inks, Peacock FeathersTwisted Citron and Abandoned Coral. I just smooched all colours on my craft mat, sprayed a bit of water, then dabbed my tags in it. After they were dry,  I intestified the colours using a Dream weaver  stencil brush and rubbing over the colors.
Here I just used a old paint brush and a bit of gesso to add texture.
To add even more texture I used my to go to script stamp and my Jet Black Lawn Fawn Ink.
Next, I die cut my Woodland Reindeer Die, glued it on using my Med Nuvo Glue pen and stamped my sentiment using again my same black jet ink. And to give it a bit more colour I used my Red Berry Nuvo crystal drops  to cover the berries. This completes my project for today, thanks for stopping by.

White Christmas

‘White Christmas’ Wine Bag is Mona Leonard’s take on the theme.
I needed the perfect bag for my friend’s Christmas gift and I only just purchased my heat press so this is what inspired me to do this wine bag… I added a fun saying and a couple of Christmas embellishments and… the rest is history…
Mona used for her project:
Canvas Corp rustic canvas wine tote with tie

Canvas Corp 12×12 printed canvas sheet Jolly Christmas
Canvas Corp Canvas remnants
Tattered Angels Glimmer Mist – Guilded Gold
Thread and needle
Silhouette/ vinyl htv
Heat Press , Markers
Scissors, Sewing machine
I started my project by measuring the rim of my bag which was close to 10 inches, took some canvas remnants and cut it 3″x18 ” to make a frill around my bag. I then flipped my bag inside out pinned my strip on canvas around the edge of my bag making little fold every few inches. I sewed it in place and flipped the bag back right side up.
I folded the ruffle back down and cut off the string that attaches the bag off with a pair of scissors.
I then printed the quote I wanted using my silhouette and some vinyl.
Once everything was cut out, I heat pressed it into place.
I found a wooden tag in my stash so I decided to spray it using my Tattered Angel Glimmer Mist Guilded Gold.
Once the spray was dry, I used a old stamp and some red ink to stamp my tag.
This is where I took my Jolly Christmas 12×12 printed canvas and cut out the little Christmas lights from it using my scissors.
I then took my Spectrum Noire Markers to color them in. Once they were dry, I placed the little lights where I wanted them and used some fabric glue to adhere them into place. To finish off my bag, I took some white thread and a needle and stitched the tag onto the bag. Then I used red tassel trim to use as my tie.
I hope you have a wonderful Christmas!
Mona

Wednesday 13 December 2017

Eddy the Snowman


Materials used to make Eddie:
Canvas Corp canvas scraps

Tattered Angels Glimmer Mist – Orange, Guilded Gold, Walnut Gold
Wooden tag
Sewing machine 
Scissors, Glue
Stuffing for snow man
Pattern material remnants
Thread, Needle, Buttons
Stickers – Tim Holtz 
Fake snow spray
I started with a piece of canvas it wasn’t quite long enough so sewed another strip of canvas at the bottom using all my remnants to make my piece longer. I folded my piece in half and proceded to draw a line where I wanted it cut.
canvas snowman canvas corp handmade christmas home decor
Once the line was traced I sewed about 1/2″ from the line all the way around leavin bottom of snowman open.
Once it was all sewed i used my scissors to cut 1/2″ outside the sewn area. I then flipped it inside out.
canvas snowman canvas corp handmade christmas home decor
I then started stuffing the snowman small prtion at a time and using elastics to make it look like snowballs. I made sure it was seperated pretty even then sewed the bottom of the snowman closed.
canvas snowman canvas corp handmade christmas home decor
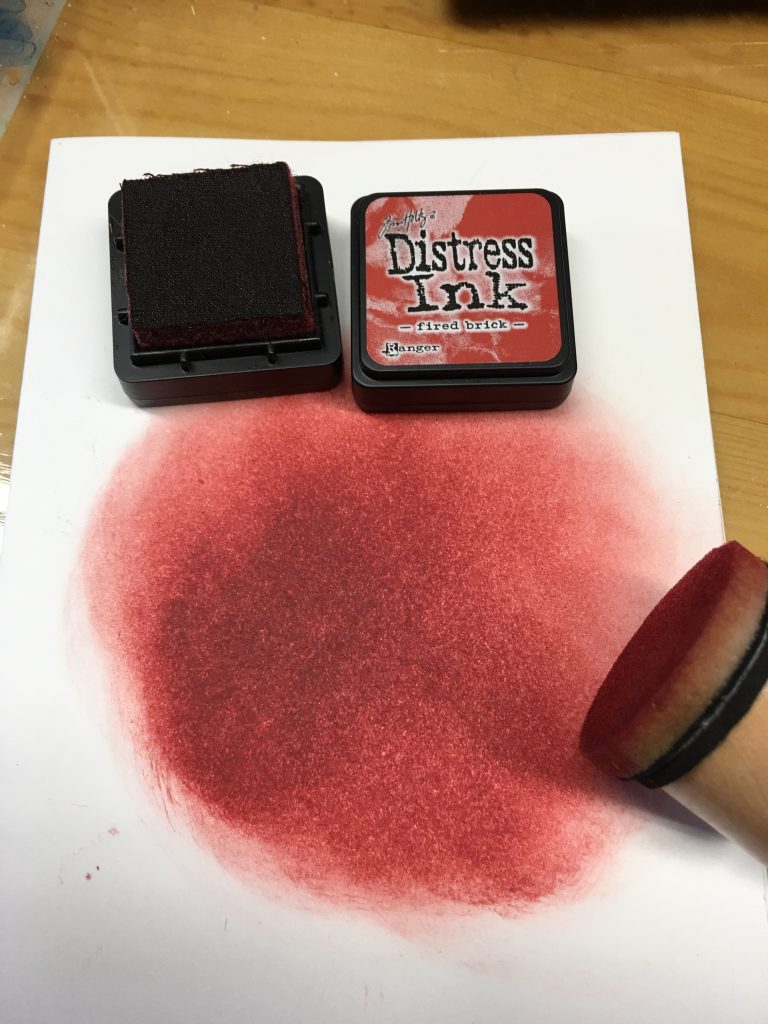
I then used my Tattered Angels Guilded Gold and Walnut Gold Glimmer Mist to make my snowman look a little more rustic.
canvas snowman canvas corp handmade christmas home decor
For the nose I used another little piece of canvas corp canvas and sewed a carrot shape nose and stuck a pencil in it to make it open. I then took my Tattered Angel Glimmer Mist in orange and sprayed my little carrot.
Then for the fun part decorating my snowman I made a long triangle using my red checkered fabric, folded it in half and sewed it close… when I put it on my snowman, I realised it was a bit too long so I had to fold the brim of the hat a few times.
I also cut a long strip of same material to make him a matching scarf.
canvas snowman canvas corp handmade christmas home decor
I cut off the end of the pencil leaving the inside piece in the nose – that made it easier to glue in place.
Now, Eddy is looking for his eyes inside my button jar. When he found a great pair of matching black buttons, I glued them on for him. HE also found two matching buttons for his belly .
Here is where I sprayed the bottom of the jar using the fake snow. I glued Eddy to the bottom of the jar and added the lid and a tag using some twine to tie the tag around the lid.
canvas snowman canvas corp handmade christmas home decor
Now Eddie, the canvas snowman has his own little home filled with snow.
It will make not only a cute holiday decoration but a fun present for one of your young Christmas guests.

Thank you for visiting today!
Mona
Blog and Instagram

Tuesday 28 November 2017

Define Naughty

Hi, it's Mona back with a card featuring Kat Scrappiness Naughty Christmas Stamp set and matching Die   ,the Pop Out Die also from Kat Scrappiness and Peeking friends from Gerda Steiner.
I started by picking a double sided patterned paper and die cutting it using the largest of  Kat Scrappiness Rectangle Cross Stitch Die  set  that fits perfectly on a A2 card base. I then took the pop out Die and die cut it more toward the bottom of the card and distressed the edges using Tim Holtz distress tool. I then added double sided tape and adhered the red ribbon on top.
I used my Red Brick disrtress ink and my blending tool to cover the opening of my pop out on my card base. Using my paintbrush, I added droplets of water to add texture to the background.
Now for the fun part I stamped and coloured in my little moose and adhered him peeking out of the hole.
I die cut the word Naughty using black cardstock and used my lawn Fawn Jet black ink to stamp the sentiment above the Naughty. This completes my card for today.  I hope you enjoyed it!
For your browsing convenience please don't forget to visit Kat Scrappiness at the link above. Thanks for stopping by.

Sunday 19 November 2017

Gingerbread tags

Hi everyone this is Mona back this time featuring Kat Scrappiness brand new  Design a Gingerbread Man Die  and used many of Tim Holtz DISTRESS OXIDE inks Cracked Pistachio , Wilted Violets , Broken China ,Faded JeansFired BrickIced Spruce are the colours I used to make my backgrounds.
I first started out by die cutting 3 of the gingerbread men using 3 different cardstock s I had in my paper stash and 3 tags with a die cut I had in my stash.
This is where I played around with my distress oxide inks making different colour backgrounds. I then took a old paint brush dipped it in water and let water drops fall on the tags. I proceeded by using different stencils and same inks giving it even more texture and then a little bit of stamping using lawn Fawn Jet Blackand for the final touches on my tags I used the same black to distress the edges. The greetings were die cut ,every thing was glued into place and attached some ribbons from my stash.
I hope you enjoyed this mini tutorial. Thanks for stopping by, hope to see you again soon!
Here is the link to Kat Scrappiness for your shopping convenience.

Sunday 5 November 2017

Hang In There


Hi everyone this is Mona back with a fun card featuring two ok Kat Scrappiness brand new Die and a  stamp set from your next stamp.
I started by cutting my card base in this picture you see it in white 41/4 x 51/2 , but I later change my mind and change it to black. I proceeded by cutting my front panel with dole sided pattern paper with the Kat Scrappiness Rectangle Stitched Die the largest of the set. I then placed my Pop out Die where I wanted the whole and die cut it and covered the back of the hole with the same cardstock. Now to give it the torn look I decided to use my Tim Holtz distressing tool around the  picks of the hole.
Now for the fun part stamping , colouring and fussy cutting all my cats and my sentiment.
Here I placed everything where I wanted it. But as you will see in my final picture I decided to cut sentiment in half,, leaving Hang in there on the front and stay pawsitive in the inside of the card. This completes my card for today.
Thanks for stopping by, hope to see you again soon. For your shopping convenience here is the link to Kat Scrappiness Store  https://www.katscrappiness.com/