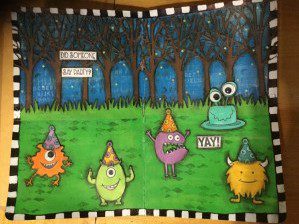
Hello everyone , Mona here with a fun project. I have decided after seeing this gorgeous stamp set that I needed to create a journal page ... I will walk you thru the steps for creating this fun page.
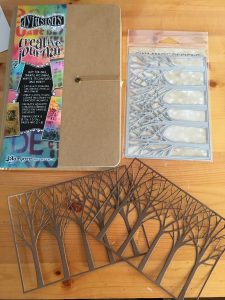
I am working in my mini Dylusions creative journal which you can special order at Kat Scrappiness . I have chosen this journal because I love the thickness of the pages, they will absorb pretty much any mediums.
I have started by die cutting a Gina Marie tree frame background die
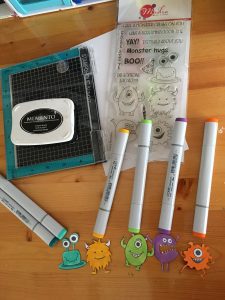
My next step was to get all my elements stamped, coloured and fussy cut. I used my Nano stamping tool from Stampoholic to stamp my images from this fun stamp set called Crazy Monsters by Mudra, using my black tuxedo memento ink pad. Then I coloured in my cute little monsters using my copic markers.
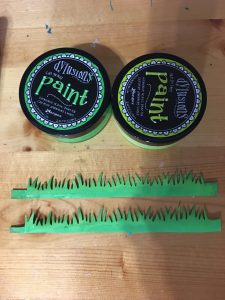
Here I have simply die cut two strips of grass using a die that I had in my stash. Used my Dylusions paints. I love using a few shades of the same colour to make it look streaky.
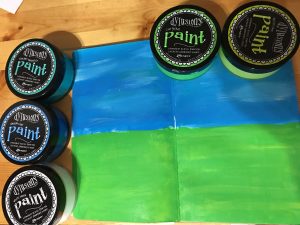
Now for the fun part, getting your background ready. I did the top part in blue to represent the sky and the bottom in green for the grass. Again I used a few shades of the same colours to have it not so uniform , more streaky.
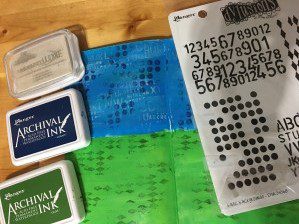
Adding texture is also one of my favourite parts of the project. I used one of my to go to stamp sets by Dylusions called basic background . For the inks I used Cobalt and Olive by Ranger and to add a little highlight in my sky, I used Wedding Dress by Memento Luxe.
Now that my background and all my elements are ready it's time to assemble everything. I used Matte Medium by Golden to adhere everything on my background and once everything was glued down I added a layer over everything to seal my page which makes it easier to add shading and the finishing touches to my layout.
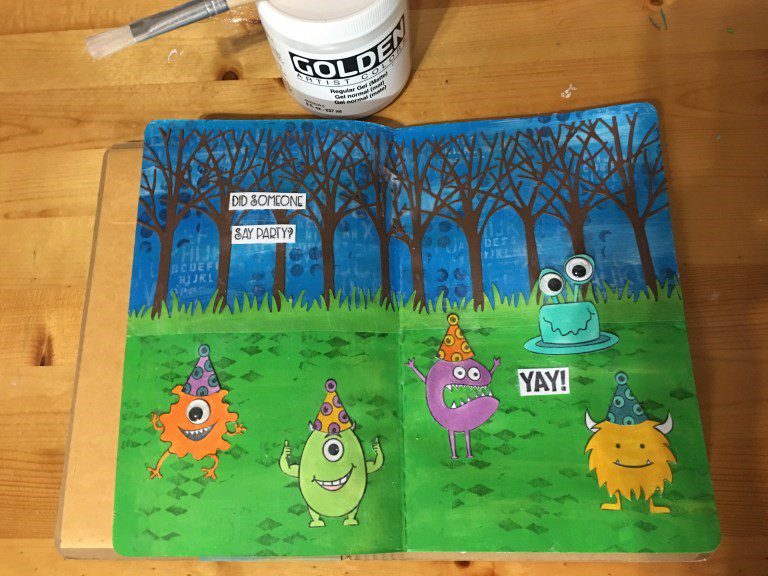
Here I started with my Faber Castell Pitt marker in black to outline and smudge it all along my elements. I then took a black sharpie marker and a white paint sharpie in white to make the frame around my page. For my final touch I had to add a bit of sparkle I used 3mm green star confetti sequins using my Crystal Katana tool.

